Creating a Hexodex For Daily Time Tracking + Plus Free Printable
Hey there crew, it’s Mark from @Menwhobullet. You can find more me on Instagram and Youtube. Today I want to share with you a time tracking tool that I learned about a few years ago from a very cool account on Instagram. The tool is called a Hexodex and I have taken the time tracking function of this idea and focused it on my workday. Using the tools patterns and time blocking, I’m able to better visualize my days and week and better understand where I am spending my time. Today, I want to show you how you make your own.
Materials:
- Archer and Olive B5 Neapolitan Notepad (Or any notebook)
- Hexagon Stencil
- Pencil
- Fineliner, Marker, or Pen
Optional:
- Colored pencils or markers
I first saw the Hexodex being used by @paperki on Instagram. While he hasn’t been active on Instagram recently, I often return to his page to admire his use of the Hexodex. A Hexodex, as defined by @Paperki, is “a visual diary fo your actions for 24 hrs”. Using 2 stacked hexagons, time blocking, tags and patterns to visual track your entire day. Tags are the activities of your tags and each one gets an accompanying pattern. What you end up with at the end of your 24 hours is a stunning visual chart of your day.
While I love the original idea of tracking a full day, I was looking for something more focused on my work day. I use my Bullet Journal mostly for work, so a lot of my productive and tasks revolve around that space. Let me show you how I create a Hexodex for a full day of work.
1. Creating your Hexodex
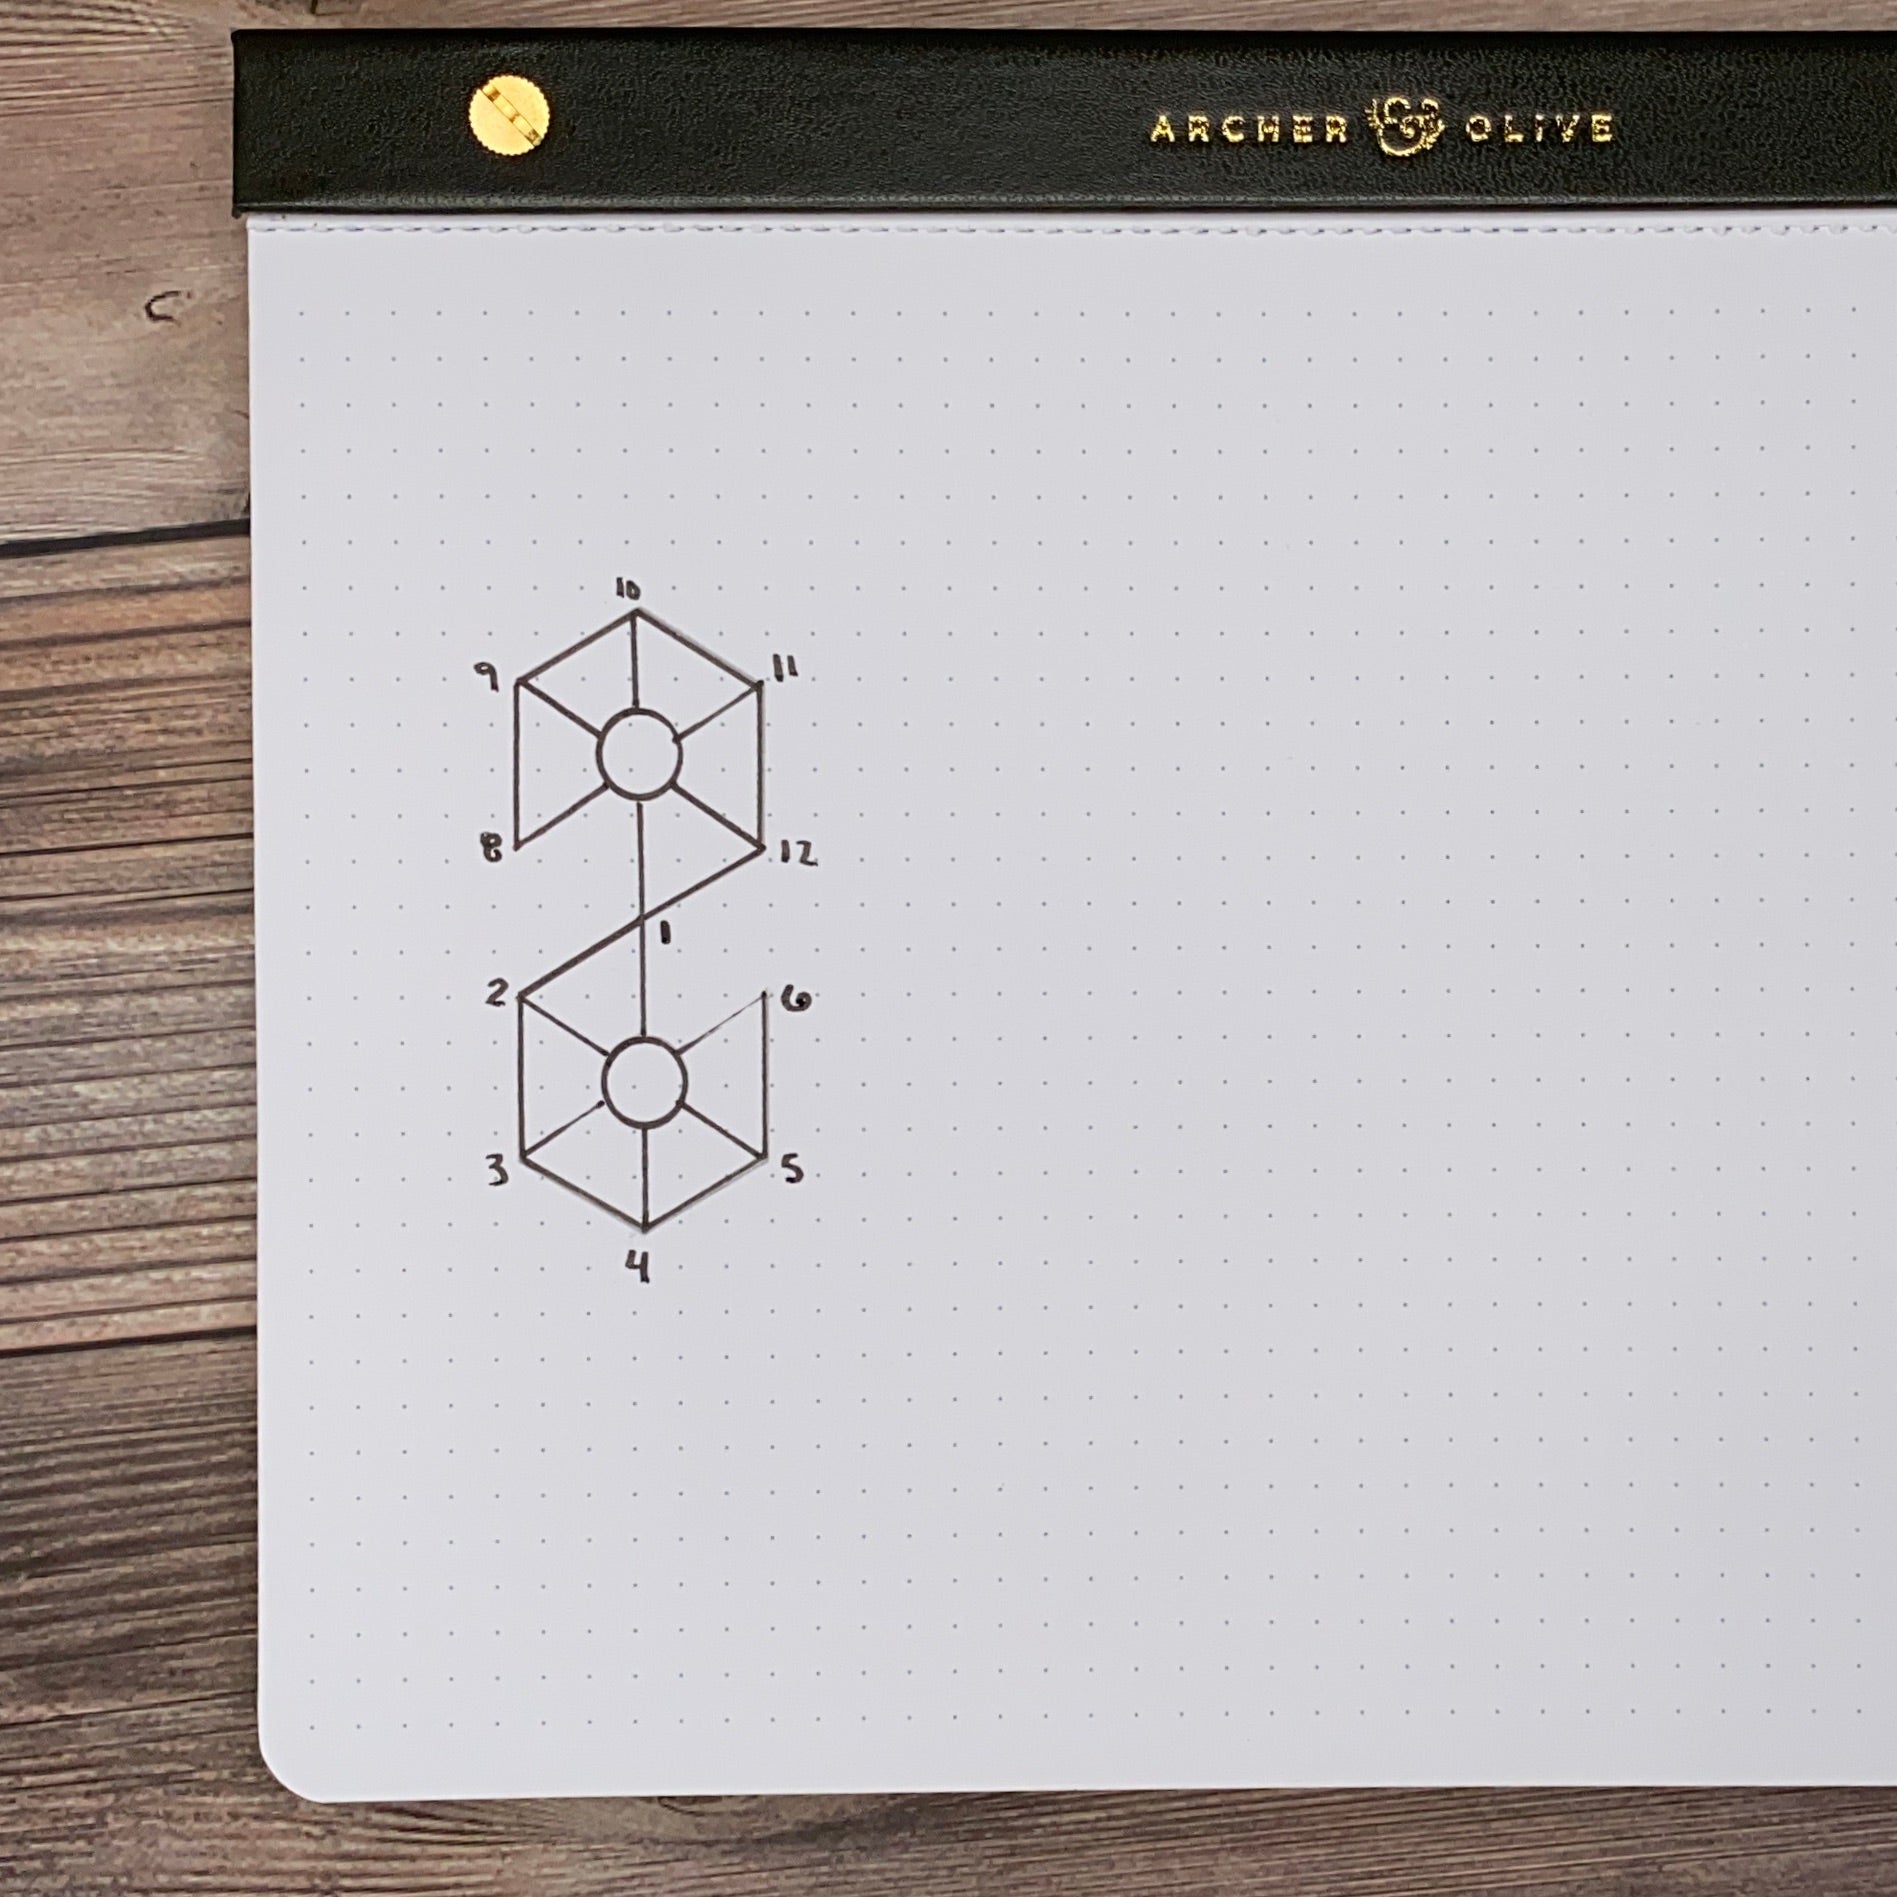
A Hexodex uses two stacked hexagons, with circles in the middle of each, to create the timeline of your day. You can use homemade hexagon templates to easily create yours. For mine, I have a plastic stencil that has hexagons on it - and this is what I use to create mine.

I recommend using a pencil first when drawing your hexodex. Two main reasons. First, You won’t use a full hexagon shape for this. You will be removing or elimination 2 lines, one from the top and bottom, to create your hexodex. Second, it’s always best to start with a pencil to reduce mistakes.
2. Connect your corners
After you draw your hexagons and circles, you are going to start connecting your diagonal corners. Doing this will create your 1-hour time blocks. You could choose not to do this for yourself, depending on your purpose, but for me most of my meetings and events at work are in 30 minute or 1 hour blocks so this work. You could also choose too just fill as you go for larger time blocks.

3. Add in your timeframes
When using a Hexodex, you are going to start from the left side of your top hexagon and work your way around in a figure 8 pattern. The original Hexodex tracks 24 hours. For mine, I start my days at 8 am which take me all the way to 6pm.

4. Create your tags and patterns
The most important part of the Hexodex is what you are putting into it. I like to think of the most common things that I am doing in a day and create my base tags from this list. Meetings, Focus Time, Training, Breaks, and Side of Desk are the main tags I use. You can always add more if you need to, no worries about trying to think of everything.

Next, for each tag you need to create an accompanying pattern. As you go through your day you are going to block out the times you are active in one of your tags and you will add add in the pattern. This is how you will build your visual time blocks. You can also add from extending notes to your hexodex with connect lines to add notes or specific details of a block.
Now that you have created a Hexodex for yourself, it’s time to start tracking. I like to incorporate my Hexodex into my daily pages as a combo visual diary and daily calendar. Many times I will build in my meetings throughout my day and use this page as a quick reference.

I hope that using the Hexodex will help you pay more attention to where you are spending your time at work, or which ever daily activities you choose you track. There are some really cool ways to level up the Hexodex with colors, watercolor, and other added stationary. But I also say, before you start adding, make sure you understand and master the foundations of this tool. You don’t want to stress yourself out over thinking this when the real focus in time tracking and time blocking.
Grab the Printable!


